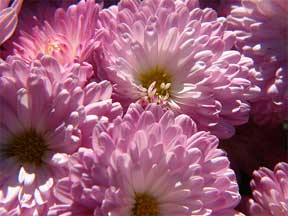
The practice of growing chrysanthemums from stem cuttings, long favored by nurserymen, has been enjoyed by home plant growers for decades.
When we follow the more familiar method of propagating young plants from root divisions, we dig old plants in the spring and from the slowly dying stumps cut off the branching root stems, each furnished with its own rootlets. We throw the old stump away, as Mother Nature would soon discard it anyway. Her example is all we have as a model, although we may improve on her ideas.
Chief among advantages of growing chrysanthemums from cuttings is the assurance of healthy plants. Root divisions are liable to certain diseases, including those fatal maladies, verticillium wilt and nematodes, microscopic worms that destroy plant tissues. These enemies linger on in the soil and in the parent plant, waiting to attack foliage and stems as the weather gets warmer.

The tips of new stems are clean and healthy. Removed before deadly diseases have had time to get a foothold, they produce vigorous plants.
New tips even from disease-ridden roots start life free from infection. With good care, they will develop into healthy plants. Nevertheless, the home gardener is well advised to destroy sick old specimens, replacing them with some of those delightful new varieties offered each year.
New scientific garden aids and new techniques encourage the amateur to embark upon this rewarding enterprise of growing chrysanthemums from cuttings. This is a simple way to do it:
When to Start
Take cuttings in early spring, while the weather is cool, and temperatures are standing steadily around 60 to 65 degrees. Growth then is rapid. Flourishing new stems appear. Earlier, when the soil is still cold and damp, cuttings plunged into this unfavorable medium hang back, coming to life only when days are long and hot. Later in the season, tender young tips wilt unfortunately.
In many parts of America, the most advantageous date to start cuttings is the second week in May, from May 15 to May 20.
Getting Ready
By way of equipment, you will need a sharp pocket knife; a shallow container in which to “puddle” the cuttings; and a supply of labels, in case you intend to keep the varieties identified.
In addition, provide a fungicide like Bayer Advanced Disease Control for Roses, Flowers, and Shrubs or Ortho Garden Disease Control effective preventive of fungus diseases; rootone, a useful hormone that stimulates root growth; and light, clean sifted soil, preferably mixed with vermiculite, a soil conditioner that promotes rapid growth.
Soil Preparation
To receive the little cuttings, dig a narrow trench six inches wide, two inches deep and long enough to allow cuttings to be set five inches apart. Have this in a shaded spot. (For example, suppose you are setting out 100 cuttings. You should need about 41 feet of trench.) I would use pots instead.
Puddling
Puddling means simply coating cuttings in a mixture of water, a fungicide and rootone, thickened with soil to make a paste. Cuttings are dipped their whole length in the paste. The proportions are these:
PUDDLING MIXTURE
1 gallon water
3 tablespoons fungicide
I tablespoon rootone
Soil to thicken to a paste
Cuttings
With a sharp knife cut off crisp, young tips five inches long, making the cuts just beneath a node (that little bump from which a bud or a branch will appear). Trim off the bottom leaves close to the stem. Now immerse each cutting in the puddling mixture, standing it upright along the side of a flat or box to drain and be handy for planting.
Planting
Set the cuttings in the trench or pot, five inches apart, one and one-half inches deep; fill in with a light, porous mixture composed of sifted garden soil, sand and vermiculite or a quality bagged potting soil.
Finally, press the soil down firmly around the cuttings with a careful foot. Two or three inches of stem will show above the soil. It is quicker to set the entire row of cuttings, Fill in with soil and then press firmly.
From now on, moisture is essential. Water every morning with a misty spray. Cuttings must never be allowed to get dry.
Transplanting
The cuttings will root in approximately 10 days to two weeks. They will be ready to set out in their permanent situations in the garden about July 1, and should be blooming gorgeously by fall. Transplanted cuttings thrive under the same conscientious treatment given new plants from the nursery. Water, fertilizer, protection from insect, disease and weed competition… these routine attentions result in flowers like those in the catalog or online pictures.
